


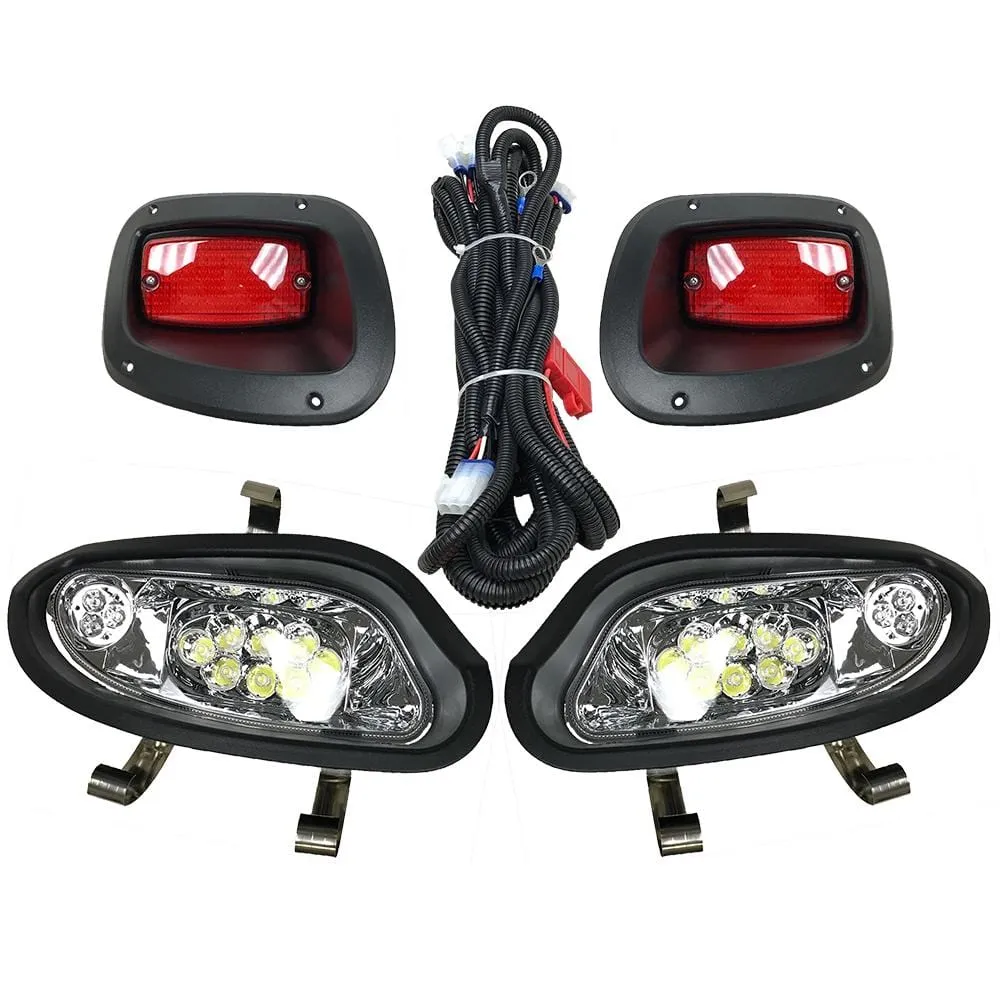

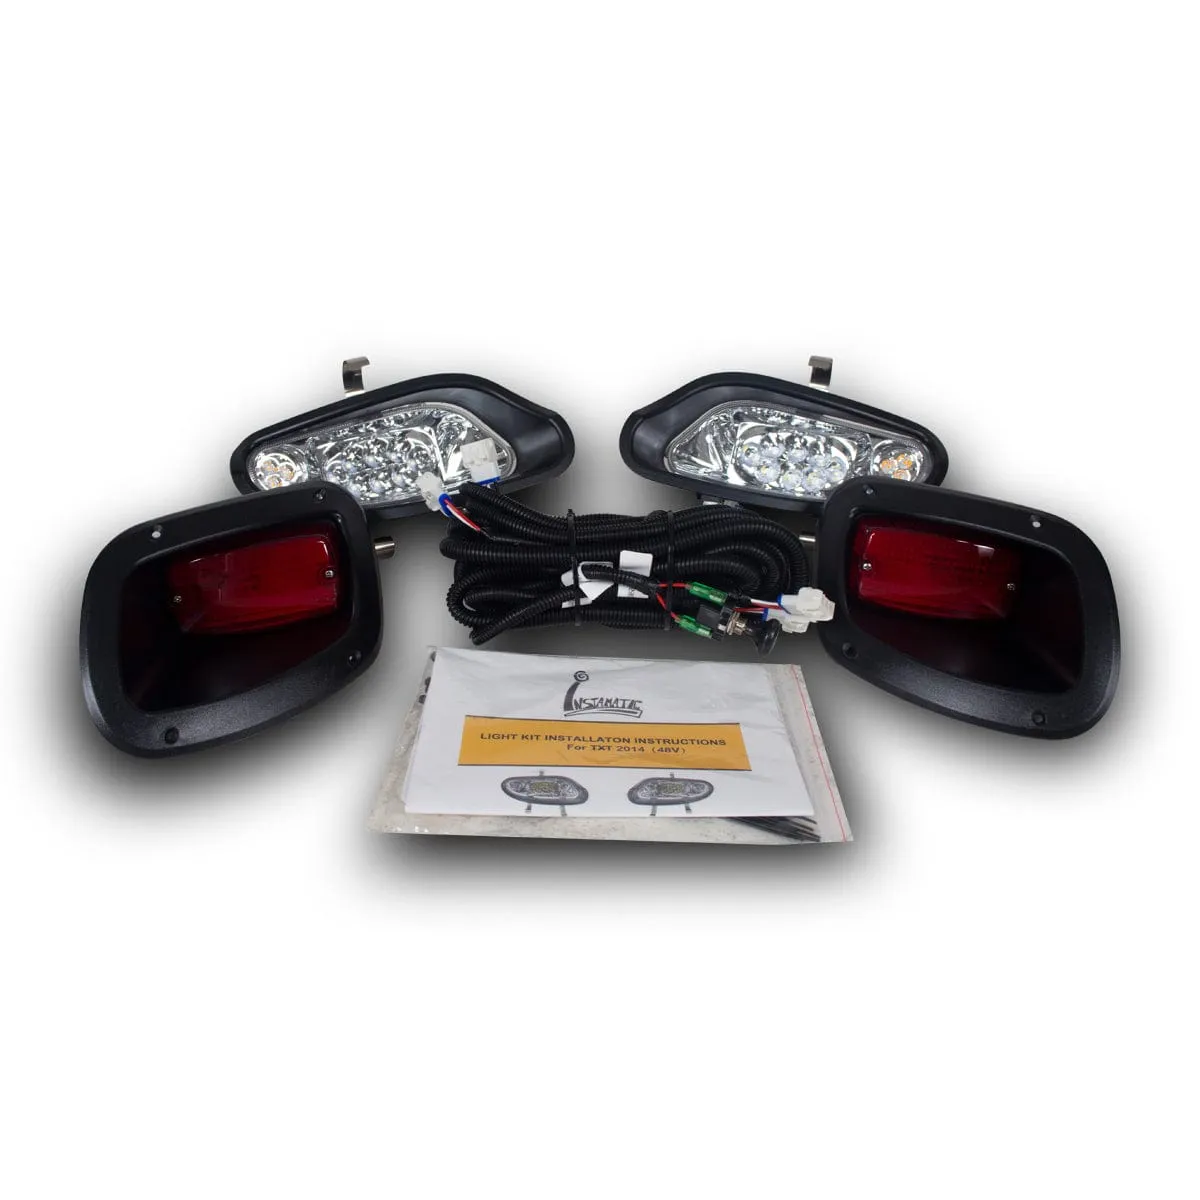


EZGO TXT Valor Headlight and Taillight Kit
Kit Includes:
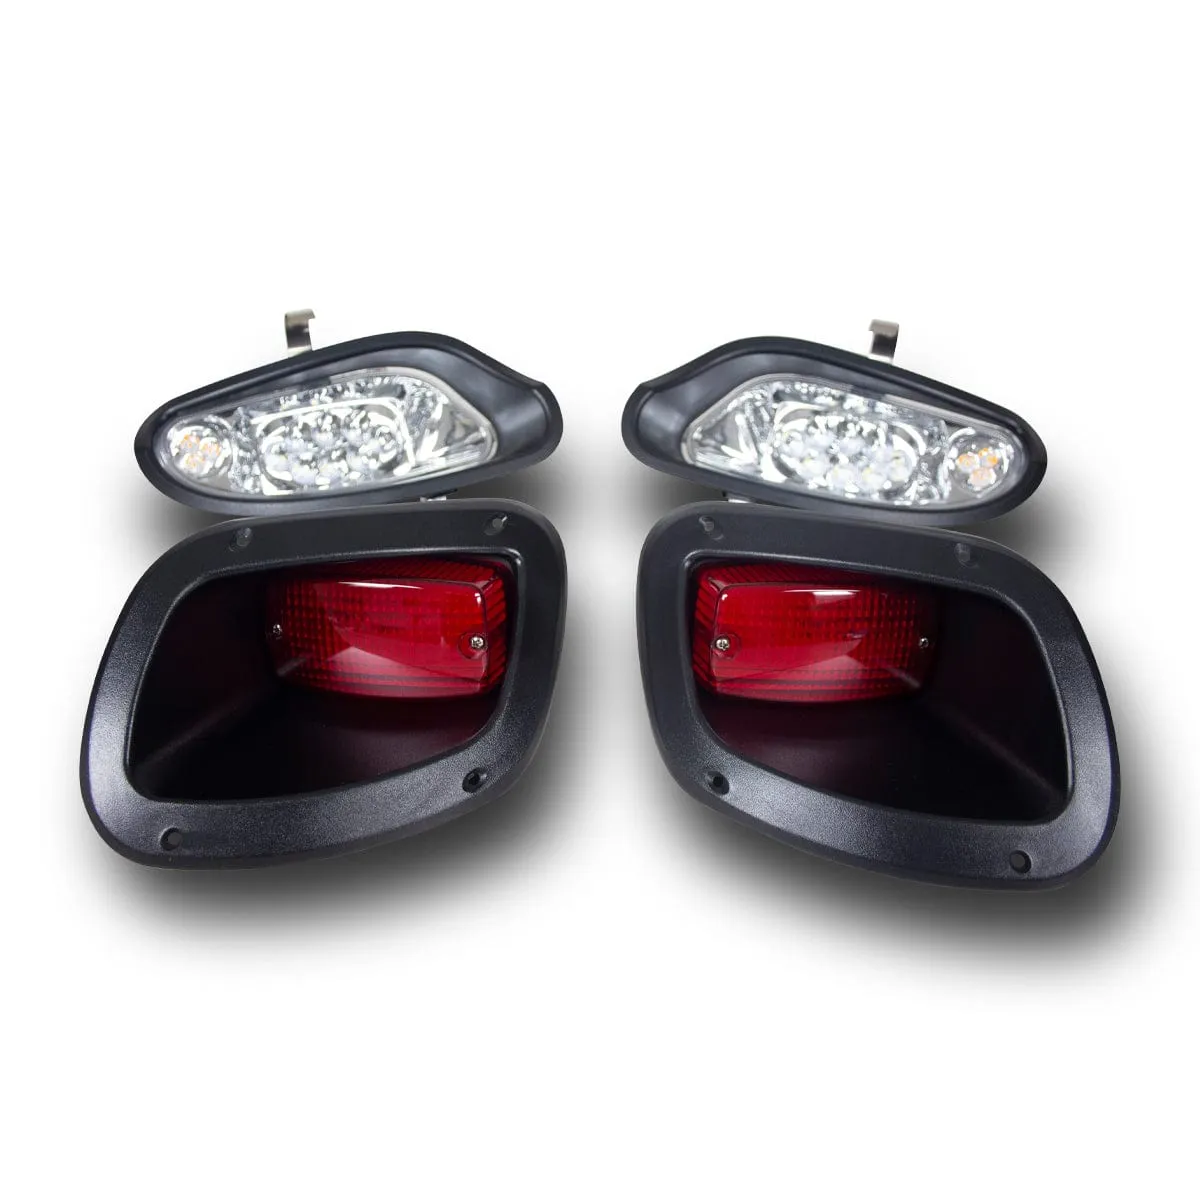
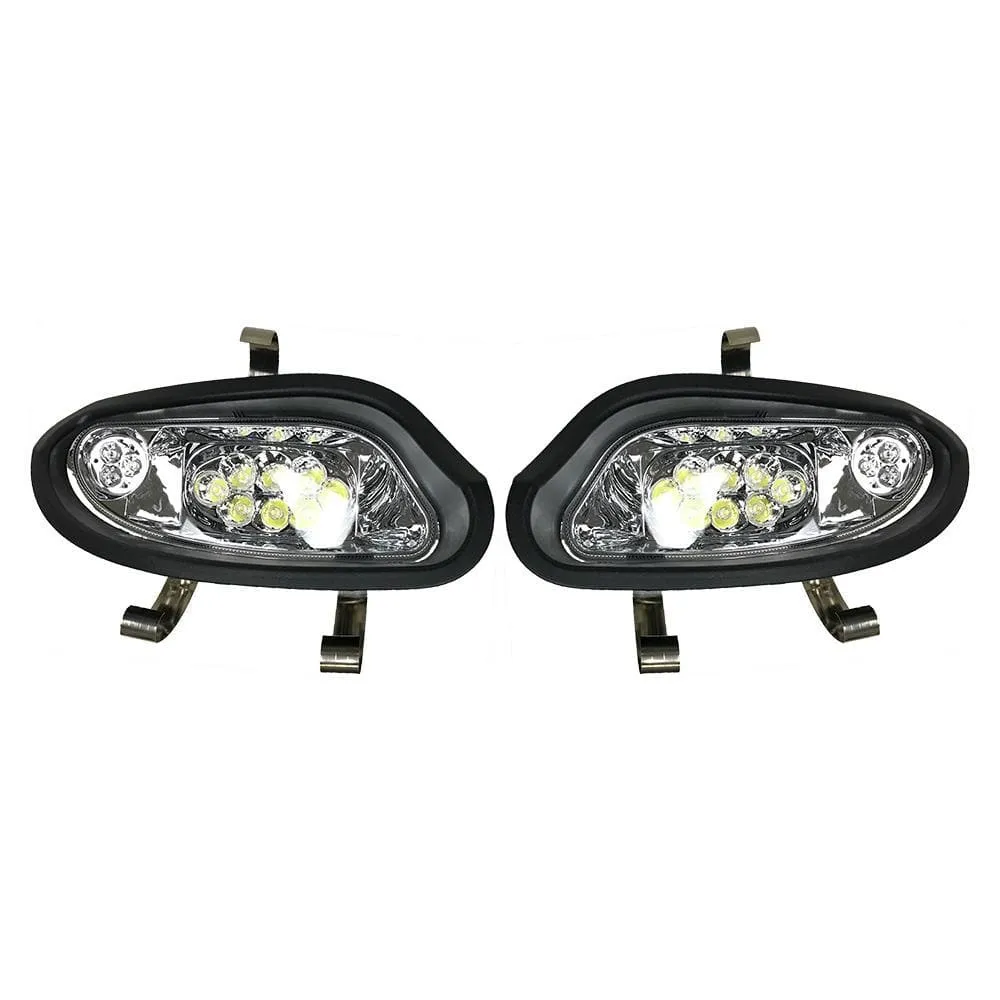
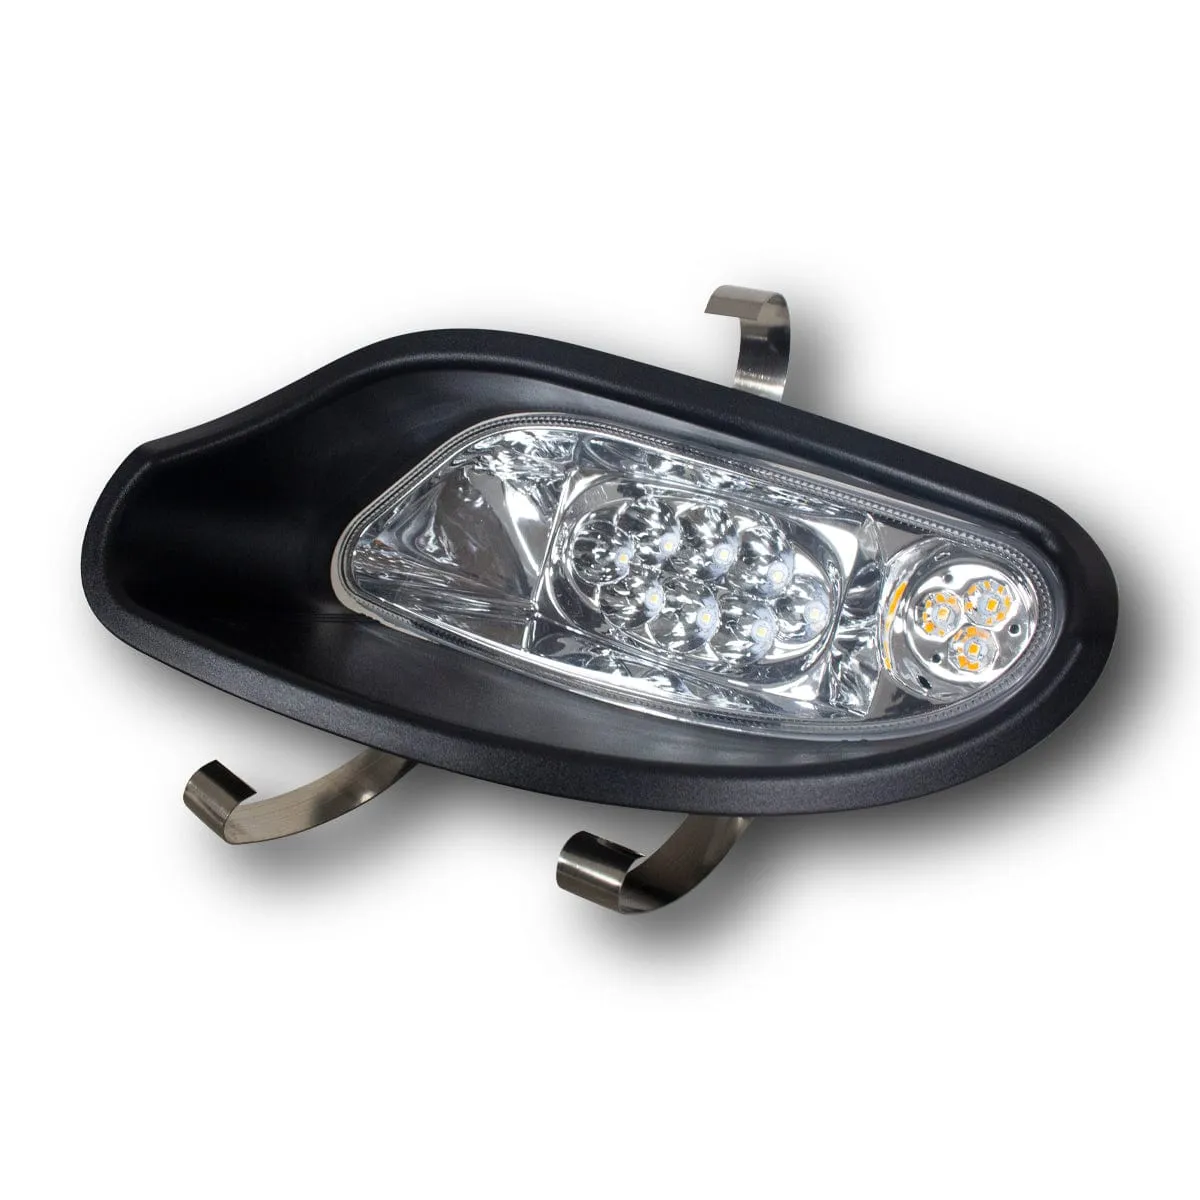
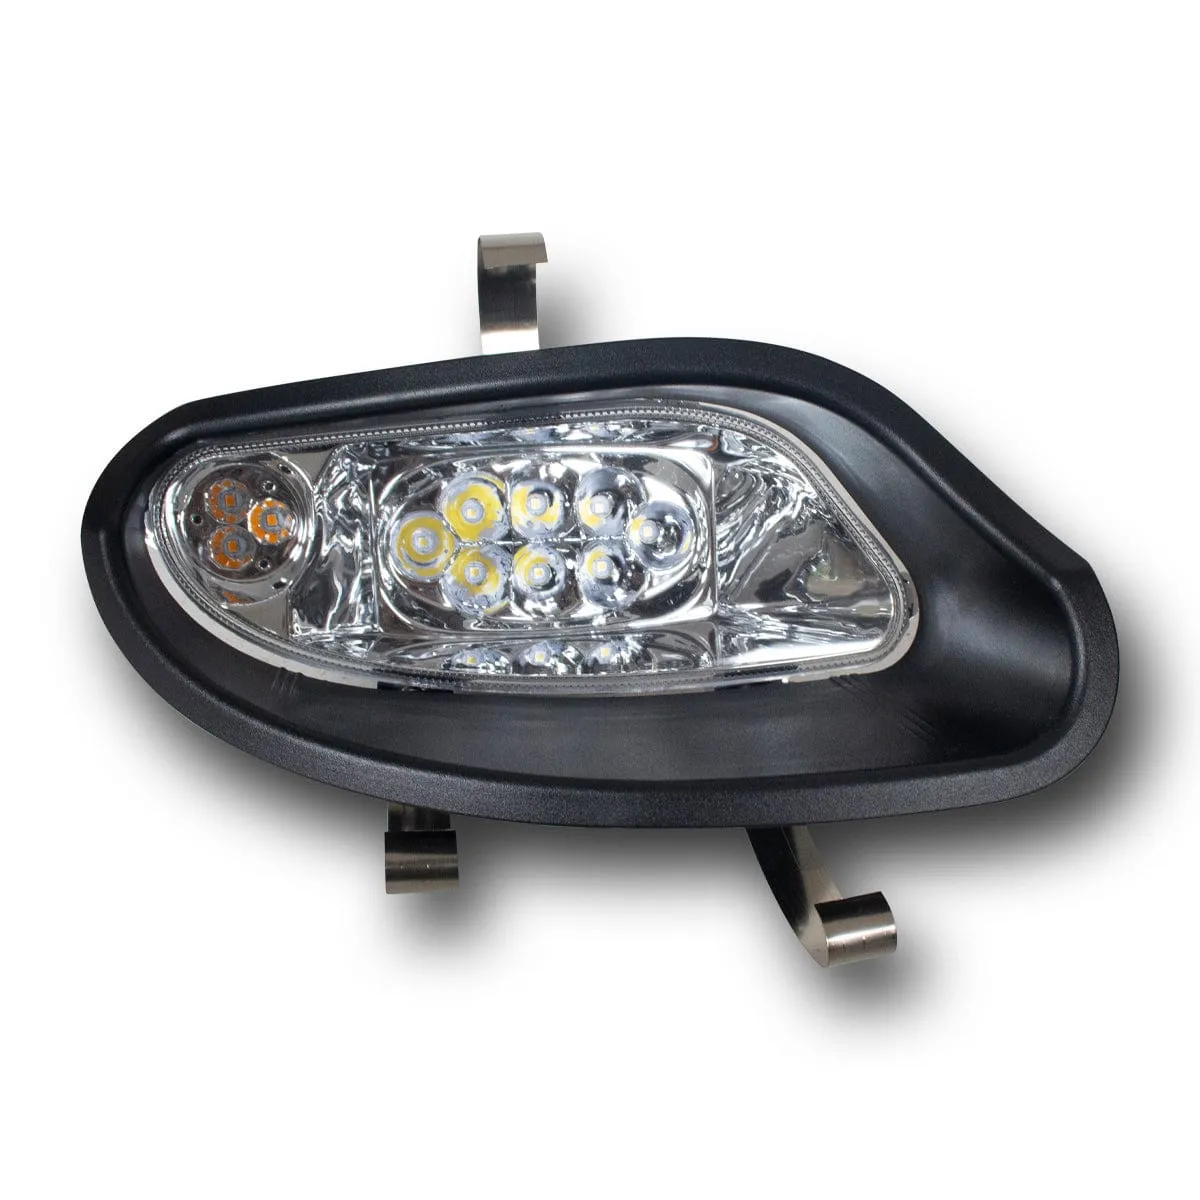
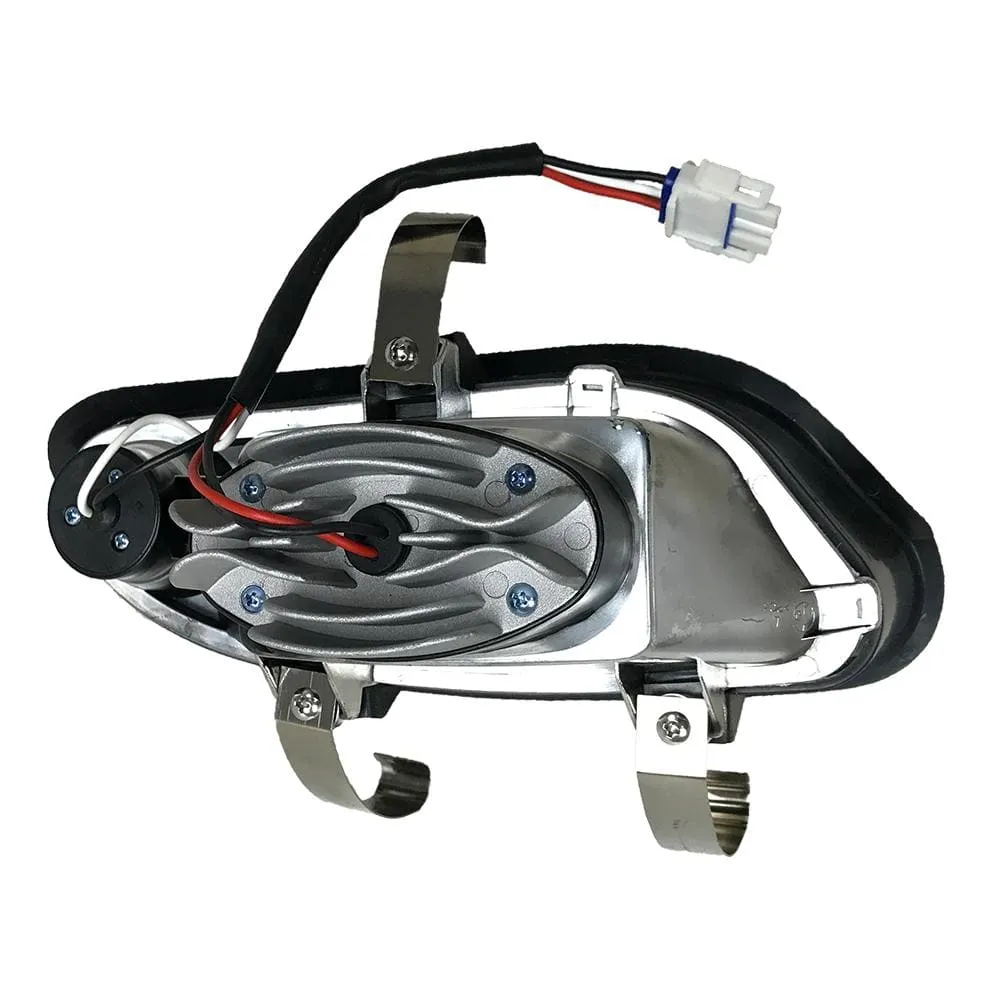
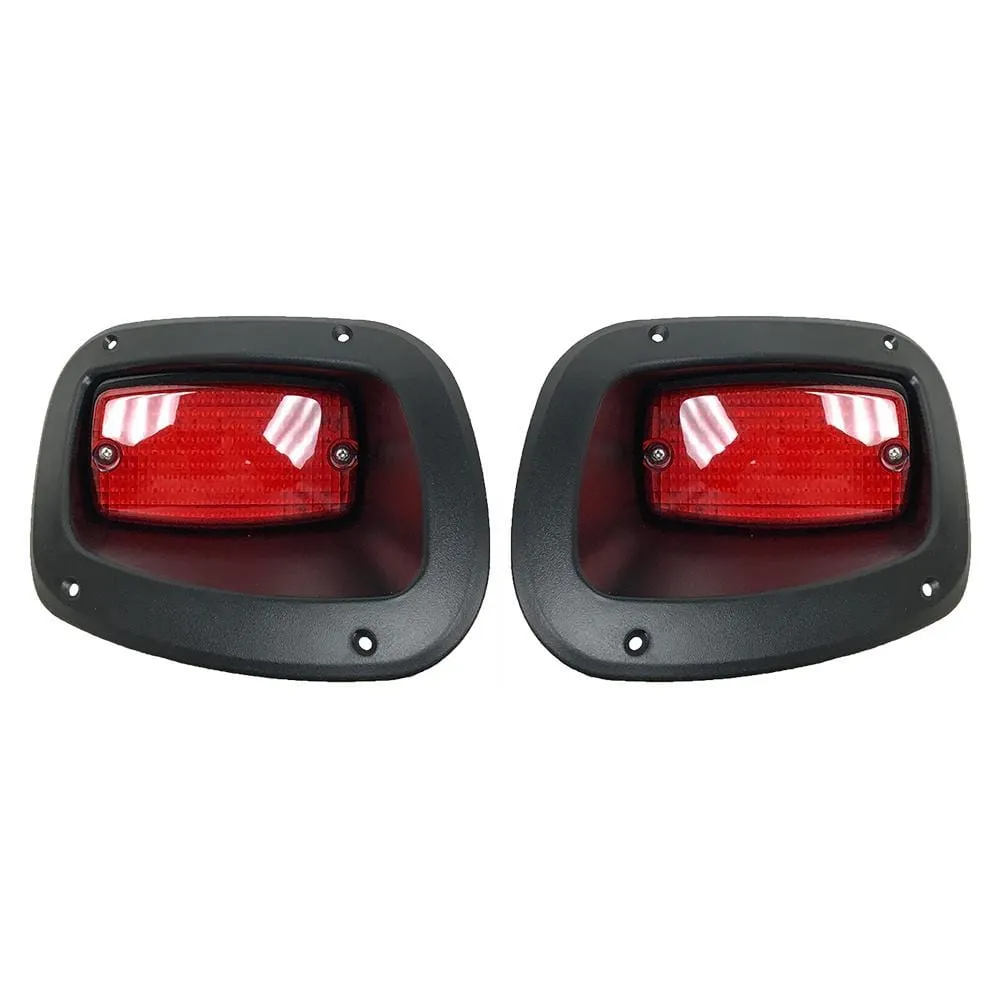
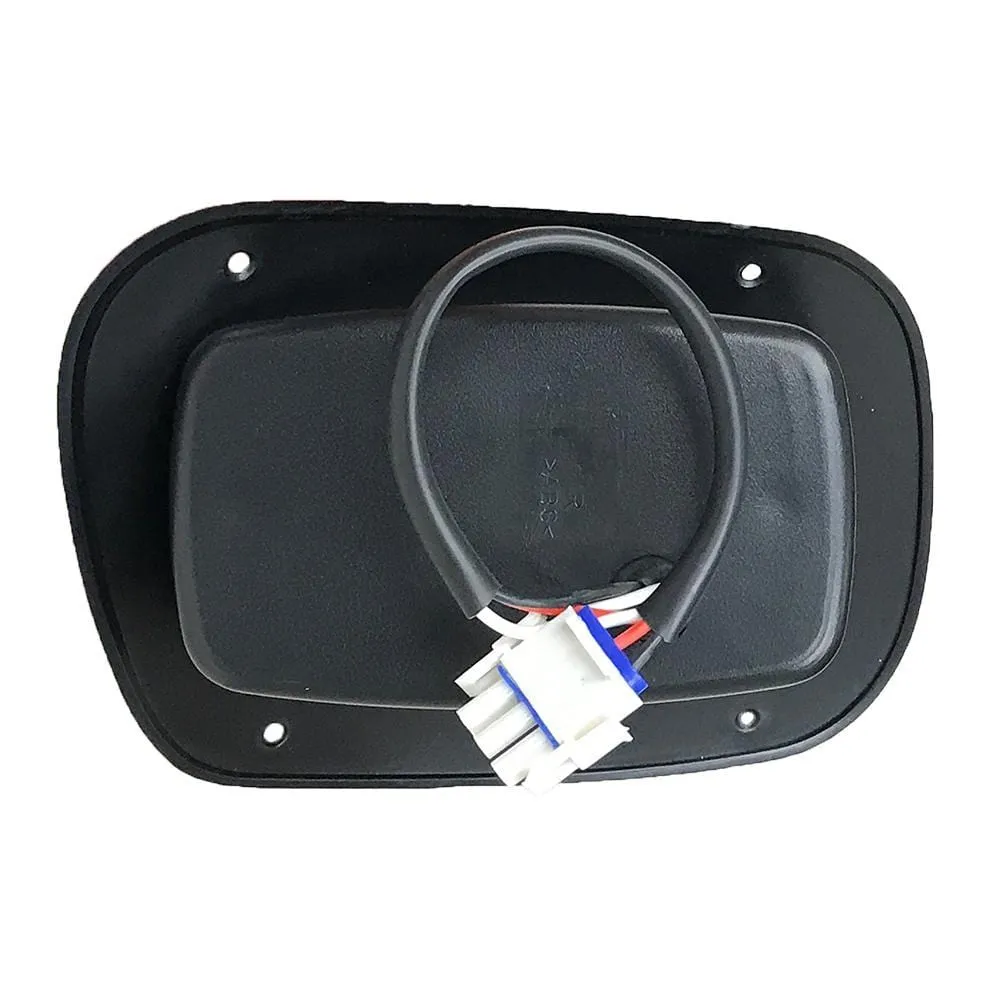
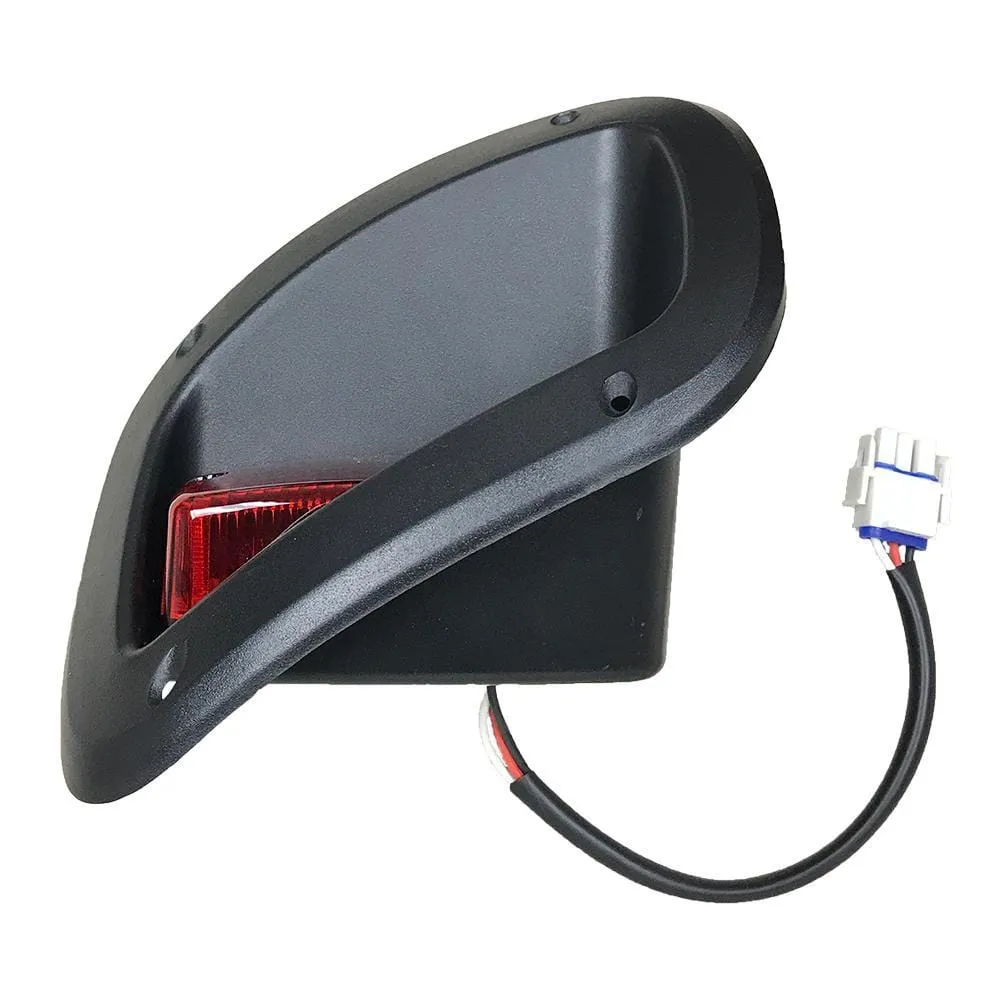
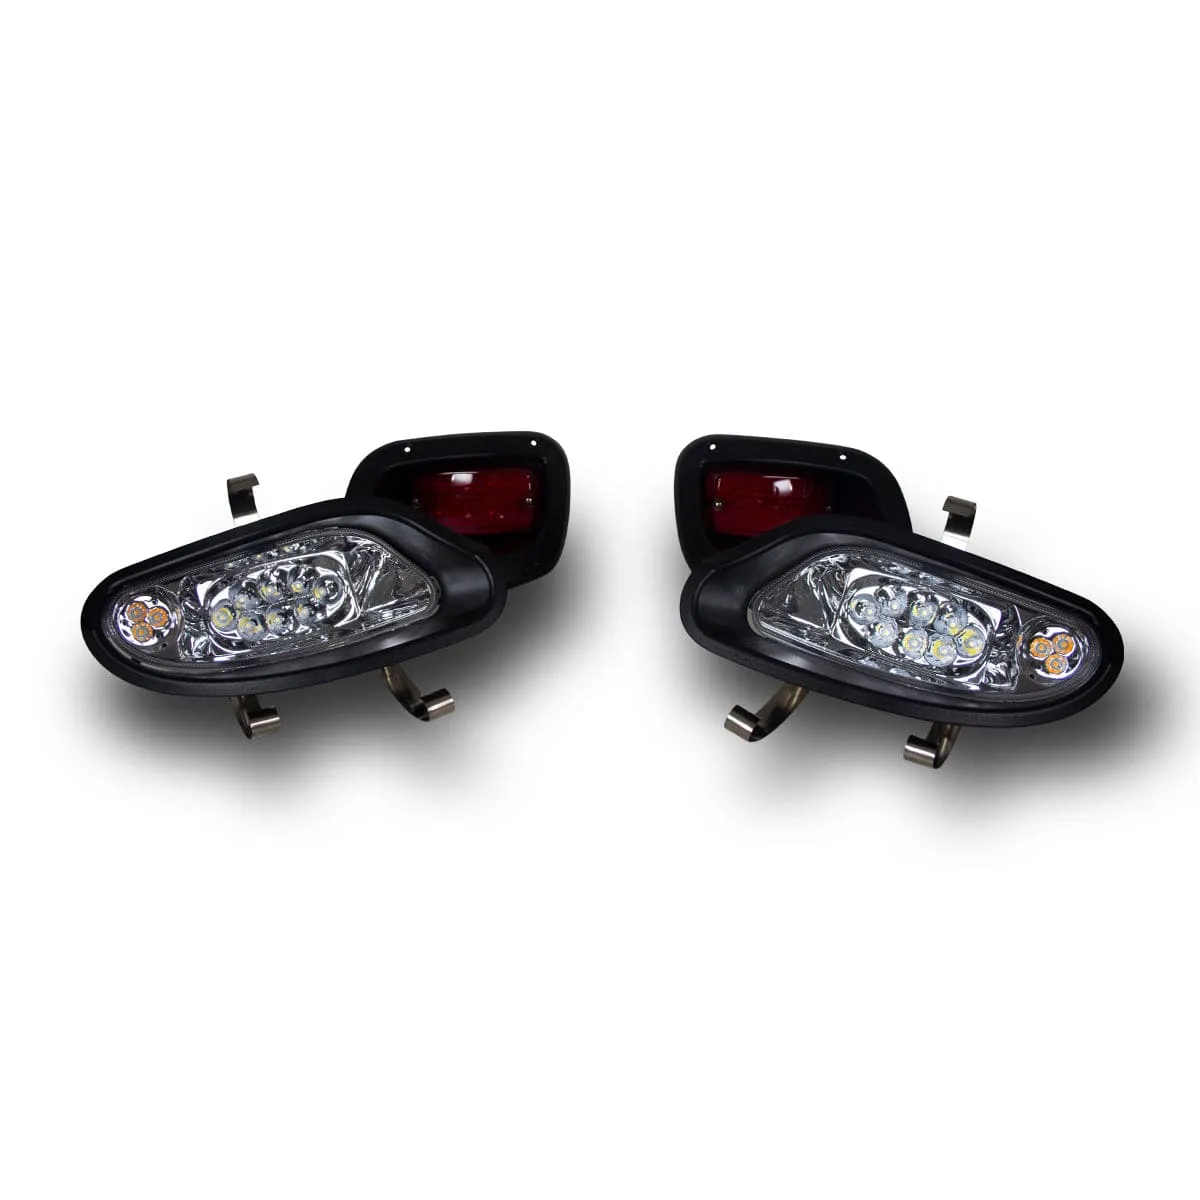
- Two LED Headlights with LED Marker Lights and Two LED Tail Lights
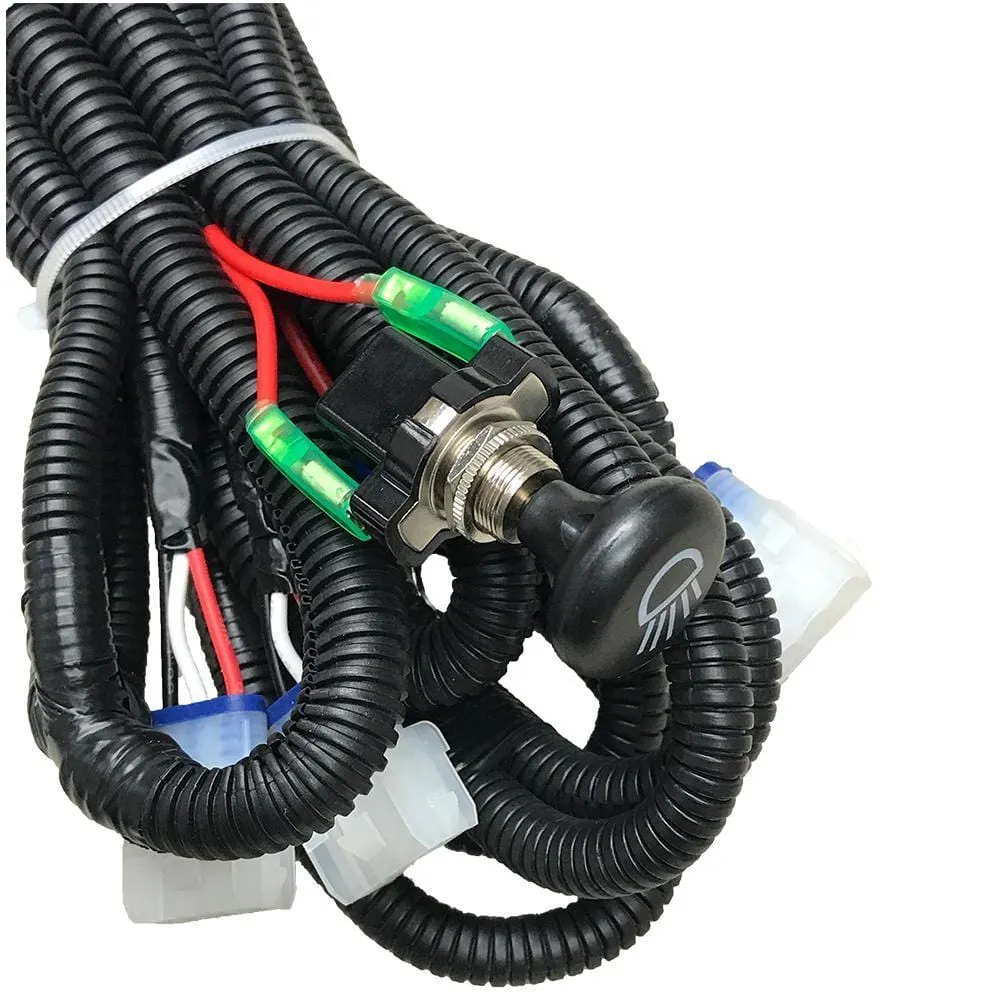
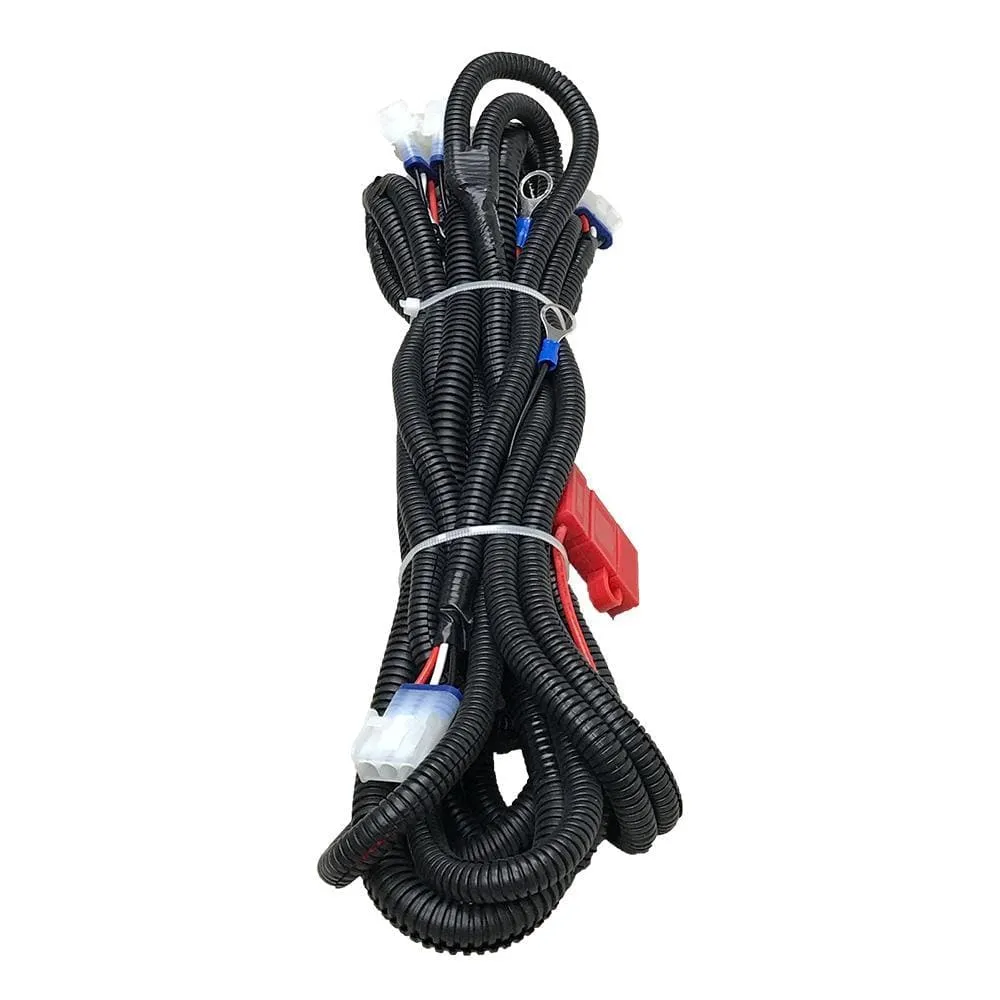
- One Wiring Harness with Push/Pull Switch
- Instructions, Light Templates, and Necessary Hardware
-
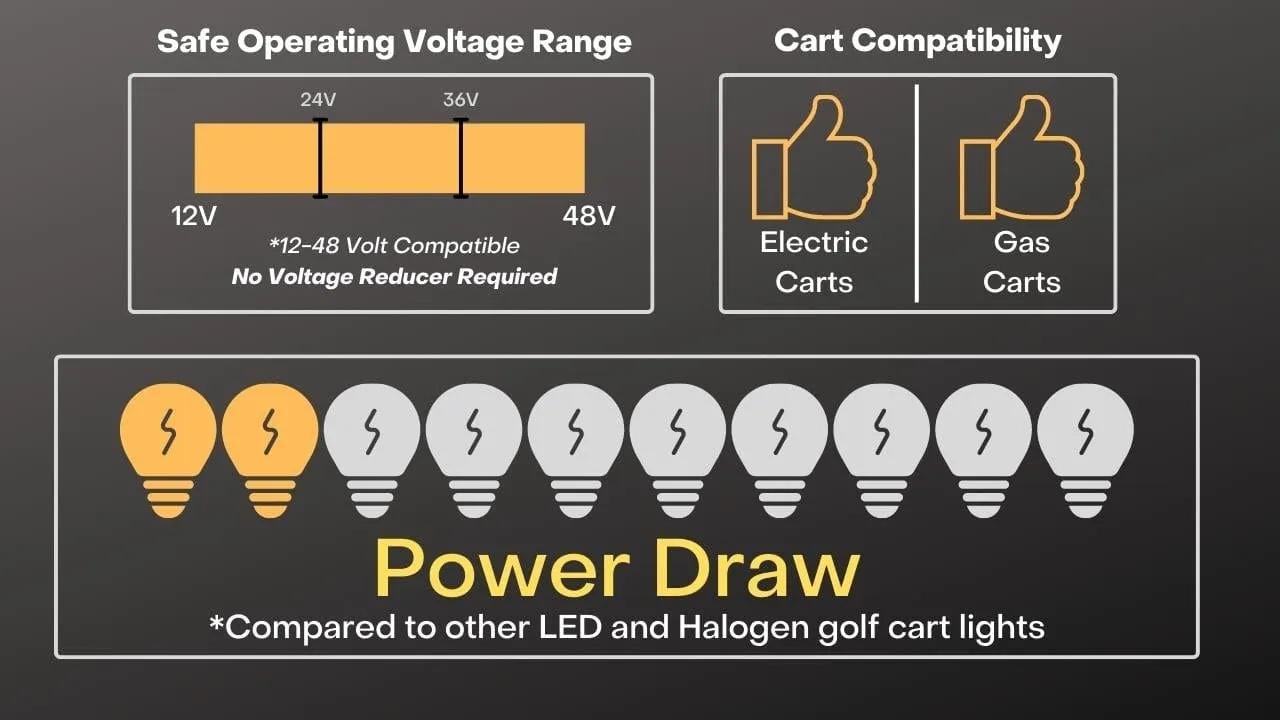
This FlexVolt™ light kit is designed to operate on 12-48 volts of power. No voltage reducer required!
Description:
These easy to install LED lights are a valuable upgrade to improve your carts style and safety! Our headlights include three heavy duty clips to that make for easy and reliable installation while the tail lights are incased in heavy duty plastic bezels to maintain a professional look. On top of that, our LED lights are very energy efficient allowing you to use your lights without putting strain on your cart's batteries!
Who is this kit for?
Designed for our customers who want simple and reliable lighting but don't need signaling capability. Primarily for customers who drive their golf carts in these locations:
- Campgrounds
- Farms
- Personal property
- Walking paths and trails
- Neighborhoods *when not using for street use
*Looking for a street-legal upgrade? Check out our
Tech Specs:
- Gas and electric cart compatible
- Operating voltage: 12 volt minimum | 48 volt maximum (no voltage reducer needed)
- Operating amperage draw: 1-2 amps
- Wire loom with the following connection ports:
- Driver and passenger headlights
- Driver and passenger taillights
- Battery(ies): Ring terminal connections
- Push/pull switch for light on/off
EZGO TXT Valor Basic Light Kit Installation Overview:
If you are installing our TXT Valor basic light kit, you are in for a treat as installation of our lights is quick and easy. There are however a few major steps that you will need to be aware of.
First, if you are not replacing existing lights, you will be required to cut into you golf cart's body cowl to place and install the headlights and taillights. We provide templates for both sets of lights so as long as you have a steady hand a little bit of patience you should get these installed in no time at all.
Second, you will also need to run our wiring harness through the body of your cart to the major connection points: headlights, taillights, power connection and the push/pull switch. See the diagram below for an overview of where those connections are located on the golf cart:
In addition to cutting out the headlights and taillights and running the wiring harness, you will need to cut out a small hole in your dash for the placement and installation of the push/pull switch.
Experience what powerful lighting can do
Customer Photos


![Davis WeatherLink Windows - Serial Port f/Vantage Vue & Pro2 Series [6510SER]](https://www.fkickvibe.shop/image/davis-weatherlink-windows-serial-port-fvantage-vue-amp-pro2-series-6510ser_XfJsuk_285x.webp "Davis WeatherLink Windows - Serial Port f/Vantage Vue & Pro2 Series [6510SER]")


